Oct 29, 2009

Happy Halloween: Candy Corn Parfait


Happy Halloween from Simple.Chic.Savory. This spooky night of ghouls and goblins happens to be one of my favorite. The crisp fall weather; the full, glowing moon; people dressed as devils, skeletons and ghosts. Chilling.

However, nothing is quite as terrifying to me than what occurs in my home on All Hallows Eve--my husband and I, home alone, stationed in front of a horror movie on the television, with a house full of...HALLOWEEN CANDY!

Like many people, I work hard to maintain healthy eating habits, but there is something about Halloween that takes me back to the ten-year-old with a bag of candy. Candy--at least a few pieces--that must be sampled before mom and dad ordered my sugared-up self to bed.

This year I am planning to make a sweet, healthy alternative to Halloween candy: a Candy Corn Parfait. With pretty layers and just the right amount of sweet, this parfait will satisfy your cravings--minus the horror of a Halloween Night Binge. Enjoy.

Ingredients
Makes 3-4 parfaits
1 package sugar-free, fat-free vanilla instant pudding
1 package sugar-free, fat-free lemon or banana instant pudding
2 small (or one large) cans mandarin oranges, drained
(Skim milk for making the pudding, as directed)
Fat-free whipped topping
Yellow food coloring--optional


Directions
In two separate bowls, prepare the vanilla and lemon/banana instant pudding as directed on the package . To make the lemon/banana extra vibrant, add a drop or two of yellow food coloring . In a glass, layer the lemon/banana pudding; then a layer of mandarin oranges; next, a layer of vanilla pudding; and finally top with a dollop of whipped topping . Garnish with one or two real candy corn if desired


Sep 24, 2009

Chicken Piccata with Pasta

Chicken Piccata with Pasta
Recipe courtesy Allrecipes.com

Ingredients

  • 1/3 cup all-purpose flour
  • 1/4 teaspoon fresh ground black pepper
  • 1/4 teaspoon paprika
  • 1 pound skinless, boneless chicken breast halves, pounded thin and cut into 2-inch pieces
  • 2 tablespoons olive oil
  • 1 clove garlic, minced
  • 1/4 cup butter, divided
  • 1 cup dry white wine
  • 1/3 cup chicken broth
  • 1/4 cup fresh lemon juice
  • 2 tablespoons capers
  • 2 tablespoons chopped fresh parsley
  • 1 (8 ounce) package angel hair pasta, cooked and drained

Directions

  1. Whisk together flour, black pepper, and paprika in a shallow dish. Dredge the chicken pieces in the flour mixture, coating evenly; set aside. Heat olive oil in a large skillet over medium-high heat; stir and cook the garlic until light brown, about 1 minute. Remove the garlic from the skillet and set aside.
  2. Place 2 tablespoons of butter into the skillet with the olive oil. Cook the chicken pieces in the oil and butter over medium-high heat until brown, about 5 minutes per side. Remove the chicken from the pan and set aside.
  3. Pour the wine into the hot skillet and bring to a boil over high heat, scraping the browned pieces from the bottom and sides of the pan. Boil the wine until it is reduced by half, about 5 minutes. Whisk in the chicken broth, reserved garlic, lemon juice and capers. Cook for 5 minutes over medium-high heat. Stir in the remaining 2 tablespoons butter and parsley. Return the chicken pieces to the skillet and continue cooking over medium heat until the sauce thickens, about 15 minutes.
  4. Meanwhile, fill a large pot with lightly salted water and bring to a rolling boil over high heat. Once the water is boiling, stir in the angel hair pasta, and return to a boil. Cook the pasta uncovered, stirring occasionally, until the pasta has cooked through, but is still firm to the bite, 4 to 5 minutes. Drain well.
  5. Remove the chicken pieces to a serving dish and drizzle with a few tablespoons of the sauce and capers. Place the cooked angel hair pasta into the skillet with the remaining piccata sauce and toss to coat.

Simple Solution

I. Love. Cookbooks. Yes, it's true--I would rather scour through the pages of a cookbook than a New York Times bestseller. And I am not ashamed to admit it. However, these glossy-paged beauties don't come cheap and definitely don't store themselves (they are cabinet-space bandits!). The simple solution? Your local library. After visiting our library, I was blown away by the vast number of cookbooks just waiting to be checked out, their pretty, colorful covers all lined up on rich-colored wooden shelves. (I become equally-enthralled by the shoe sale room at my favorite department store) From classics by chef Julia Child to new releases, your library is sure to have a great selection. Check out as many as you like, enjoy the new recipes you find and be spared the eye-rolls when your husband sees you jamming another cookbook in your already-packed cabinet.


P.S. You'll also be supporting your local public library.

Apple Shallot Pork Chops

A perfectly-cooked pork chop is a simple, delicious main dish. Add a few simple extras to your pork chops and they go from simple to simple, chic and savory. This recipe is courtesy of Whole Foods (if you weren't aware, they have an incredible library of recipes online). These chops are flavorful, perfect for fall with the rich flavor and the apples and simple to prepare. Enjoy.


Ingredients (Serves 4)
1 cup thinly sliced shallots (about 3 large)
1 large apple (Gala or Granny Smith), thinly sliced
Salt and pepper for seasoning
2 tablespoons 365 Everyday Value™ Extra Virgin Olive Oil
4 pork loin center-cut chops, bone-in
2/3 cup barbecue sauce


Directions
Position oven rack to middle shelf; preheat to 450ºF . Spray 9 x 13-inch baking dish with nonstick spray . Layer shallots and apples in dish; season with salt and pepper; set aside.

Heat oil in large skillet over medium-high heat . Season pork chops with salt; add to pan; sear each side for 2 minutes; place seared pork chops on top of apples . Evenly distribute half of sauce over pork chops . Place in oven; immediately turning down heat to 375ºF . Roast 15 minutes . Spoon remaining sauce over chops; cook additional 15 to 20 minutes, or until internal temperature reaches 160ºF to 165ºF on instant-read thermometer.

Nutrition
Per serving (about 8oz/219g-wt.): 340 calories (150 from fat), 16g total fat, 4g saturated fat, 70mg cholesterol, 330mg sodium, 27g total carbohydrate (2g dietary fiber, 17g sugar), 22g protein

Chicken Caprese (Restaurant-Inspired!)

Have you ever dreamt of a re-creating a delicious dish you enjoyed at a restaurant only to find yourself doubting your culinary ability to make a knockout knock-off? Don't doubt yourself for a second--with a little research, some fresh ingredients and (totally optional) a glass of wine, you can have your [insert fabulous dish here] and eat it too.

After finding myself with a strong craving for the Olive Garden's Chicken Caprese, I decided to research similar recipes on the web. I came across an Olive Garden-inspired recipe on CDKitchen, read others' reviews of the recipe and decided to put the recipe to the test.

What did I end up with? Only one of the most delicious restaurant-quality meals I've ever enjoyed...at my dining room table. Fresh plum tomatoes and fresh basil made this chicken a stand-out. This recipe would be perfect for an intimate evening with guests. You (and the Caprese) will be the stars of the show.


Ingredients (Serves 6)

2 pounds plum tomatoes
30 medium fresh basil leaves
2 teaspoons black pepper
6 boneless skinless chicken breasts or chicken breast fillets
4 tablespoons extra-virgin olive oil, divided
1/2 cup white wine
3 tablespoons garlic, minced, divided
1 1/2 cup heavy cream
3 1/2 teaspoons Italian seasoning, divided
1 cup Parmesan cheese, grated
1 1/2 teaspoon salt PLUS 1 tablespoon salt, divided
1 cup vegetable oil
2 cups mozzarella cheese, shredded
1 1/2 cup flour PLUS 1 tablespoon flour, divided
1 pound dry capellini pasta (I chose to use whole wheat angel hair pasta)

Directions

Core and cut tomatoes into 1-inch pieces . Chef's Note: To preserve juices and seeds, use a paring knife to remove just the top of the core on each tomato . Cut basil leaves into 1-inch pieces . Combine Roma tomatoes, basil, 2 tablespoons olive oil, 2 tablespoons minced garlic, 1 1/2 teaspoons Italian seasoning and 1 1/2 teaspoons salt in a large bowl and blend thoroughly . Cover, set aside and refrigerate for at least 1 hour.

Preheat oven to 350 degrees . Coat a large, non-stick skillet with vegetable oil and heat over medium-high heat . Combine 1 1/2 cups flour, 1 tablespoon salt, black pepper and 2 teaspoons Italian seasoning in a shallow dish . Dredge chicken in the mixture, shaking off any excess . Place chicken in skillet and saute for about two minutes on each side, or until just golden brown. If skillet is not large enough, saute the chicken in batches . When finished, transfer chicken to a large baking dish and place in oven to cook for approximately 10 minutes or until chicken is cooked through and the internal temperature reaches 165 degrees.

Cook pasta according to package directions . Drain and set aside until needed.

While pasta is cooking, heat 2 tablespoons olive oil in a medium sauce pan over medium heat . Add 1 tablespoon minced garlic and saute for approximately 1 minute . Do not brown . Slowly add 1 tablespoon flour and stir to combine . Add white wine and bring to a boil . Boil for approximately 1 minute.

Remove marinated tomato and basil mixture from refrigerator . Drain tomatoes and basil from liquid and set aside until needed . Add 1/2 cup of the marinade liquid and saute for approximately 1 minute . Add heavy cream . Lower heat and bring to a simmer . Add grated Parmesan cheese.

Preheat broiler . Remove chicken from baking dish and set aside until needed . Transfer pasta to baking dish and partly coat with sauce . Pour desired amount of the remaining sauce on pasta and evenly distribute tomatoes and basil over pasta . Place chicken on top of pasta . Sprinkle shredded mozzarella cheese evenly over chicken . Place baking dish under broiler for approximately 2-3 minutes or until mozzarella cheese has melted.

Sep 11, 2009

Currently Craving

To me, there isn't much that makes me feel more fabulous than cooking a delicious meal. However, I am fairly certain that being able to cook in an adorable apron from girlyaprons.com would really glam up my culinary experience. I am currently craving this beautiful apron. You'll find a link to view this apron here. At Girly Aprons you will find a diverse selection of beautiful aprons, kitchen linens and more--all retro, cute and stylish. Now if only the tray of perfectly-baked chocolate chip cookies I envision myself holding while wearing this apron would just bake themselves.

Farfalle with Sausage, Artichokes and Sun-Dried Tomatoes

This recipe is courtesy Giada De Laurentiis of the Food Network. The changes I made were using ground turkey sausage and farfalle (bow-tie pasta) rather than fusilli. All I can say is that this dish was truly, honestly one of the best things I've ever eaten. I hope you enjoy the recipe as much as I did. Oh, and don't forget to enjoy some of that wine while you cook.

Ingredients
3/4 cup drained oil-packed sun-dried tomatoes, sliced, 2 tablespoons of oil reserved
1 pound Italian ground turkey sausage
2 (8-ounce) packages frozen artichoke hearts
2 large cloves garlic, chopped
1 3/4 cups chicken broth
1/2 cup dry white wine
16 ounces farfalle pasta
1/2 cup shredded Parmesan, plus additional for garnish
1/3 cup chopped fresh basil leaves
1/4 cup chopped fresh Italian parsley leaves
8 ounces shredded mozzarella cheese
Salt and freshly ground pepper


Directions
Heat the oil reserved from the tomatoes in a heavy large frying pan over medium-high heat . Add the sausage and cook until brown, breaking up the meat into bite-size pieces with a fork, about 8 minutes . Transfer the sausage to a bowl . Add the artichokes and garlic to the same skillet and saute over medium heat until the garlic is tender, about 2 minutes . Add the broth, wine and sun-dried tomatoes . Boil over medium-high heat until the sauce reduces slightly, stirring occasionally, about 8 minutes.

Meanwhile, bring a large pot of salted water to a boil . Cook the farfalle in boiling water until tender but still firm to the bite, stirring often, about 8 minutes . Drain the pasta (do not rinse) . Add the pasta, sausage, 1/2 cup Parmesan, basil and parsley to the artichoke mixture . Toss until the sauce is almost absorbed by the pasta . Stir in the mozzarella . Season, to taste, with salt and pepper . Serve, passing the additional Parmesan cheese alongside.

Aug 15, 2009

Gingersnap Peach Pie

There's nothing better than dessert...or perhaps there's nothing better than dessert that will allow you to still be able to slip into your skinny jeans this fall. Enter Weight Watchers Gingersnap Peach Pie. The contrast of the spicy, gingersnap crust with the sweet, juicy peaches was incredible. It had just the right amount of sweetness and oh, was it simple. I chose to leave the skin on my peaches for a rustic-looking dessert, but they could certainly be removed. You can have your pie and eat it too. For you Weight Watchers, it has a points value of 3.

Ingredients
2 pound(s) peach(es), yellow or white variety
1/3 cup(s) sugar
2 tbsp. fresh lemon juice
1 tsp. ground cinnamon
1 tbsp. cornstarch
2 tbsp. Butter
4 oz gingersnap(s), about 18 cookies

Directions
Preheat oven to 400 degrees . Cut peaches in half and remove pits. Cut each peach half into four slices . Combine peaches, sugar, lemon juice, cinnamon and cornstarch in a medium bowl; set aside . Melt butter in microwave or on stove top. Crush gingersnaps into crumbs; place in a small bowl. Pour melted butter into crumbs and combine thoroughly . Pat crumb mixture into bottom of a 9-inch ceramic or glass pie plate; make sure crumbs are evenly distributed . Starting at edge of pie plate, arrange peach slices in concentric circles so that they cover entire surface of pie and form a petal-like pattern . Pour any remaining liquid from peach mixture over top of pie so it is evenly distributed . Bake pie in bottom 1/3 of oven for 20 minutes; reduce heat to 325ºF and bake for 40 minutes more . Remove from oven and cool completely in pie plate on a wire rack (about 2 hours) . Slice into eight pieces just before serving . Yields one piece per serving

Aug 13, 2009

Chicken Stuffed with Cream Cheese and Chives


Finding yourself stuck in a rut when it comes to preparing chicken breasts? Shake up your routine with this simple recipe. Cream cheese can be found in many of our kitchens, but if you don't happen to have chives, simply switch it up. Try dried seasoning such as Italian dried herbs, garlic powder, chopped onion or whatever sounds delicious to you. Serve with your favorite vegetable, potato, rice or a side of crusty French bread.

Ingredients
Four boneless, skinless chicken breasts (thawed)
1 1/2 tbsp. olive oil
Salt and pepper
1/2 cup cream cheese (I used light to save calories)
1 tbsp. fresh chives, finely-chopped
1/4 tsp. garlic powder

Directions

Preheat oven to 350 degrees . Using two sheets of wax paper or plastic wrap (one on top, one on bottom), cover chicken and pound until thin . Mix together cream cheese, chives and garlic powder . In the center of each chicken breast, place 1/4 the cream cheese mixture . Roll up the meat and secure with toothpicks . Salt and pepper the outside of each chicken breast . Heat oil in pan over medium heat . Place chicken in pan and cook for 3-4 minutes on each side (enough time to achieve a golden sear on each side) . Remove pan from burner and place inside oven . Bake at 350 degrees for 30 minutes or until chicken is cooked through . When finished, remove chicken and allow to rest 5 minutes . Serve with extra chives sprinkled on top for garnish, if desired


NOTE: Be sure to use a pan that is oven-safe. I chose to use a stainless steel pan with stainless steel handle. Please remember that the pan's handle will be HOT when removing it from the oven. (I know, I know, but grabbing the handle is a force of habit!)

Aug 10, 2009

Simple Southwestern Soup

Quick, easy and flavorful--this soup is the ideal quick-fix meal. Southwestern-style comfort food in less than 30 minutes? Yes, it's that simple.

Ingredients
2 tbsp. olive oil
3/4 cup diced onion
2 cloves garlic, minced
1 can red beans, rinsed and drained
1 can whole kernel corn, drained
1 can diced Italian-style tomatoes, with juice
2 cups stock, chicken or vegetable (to create a vegetarian dish)
1 tsp. cumin
1 tsp. salt
1 tsp. lime juice
1/2 tsp. pepper
1/2 tsp. dried cilantro

Directions
Heat olive oil in pot over medium heat . Add garlic and onions and saute until tender . Slowly add stock and then beans, corn and tomatoes . Add cumin, salt, lime juice, pepper and cilantro . Stir well . Allow to simmer for 15-20 minutes . Serve with dollop of light or fat free sour cream and tortilla chips

Note: To make the tortilla chips shown in the photo, preheat oven to 375 degrees . Cut whole grain tortilla into triangles . Brush each side with olive oil and sprinkle with pepper, sea salt, dried cilantro and garlic powder on baking sheet/stone . Bake for 10 minutes or until light golden brown

Aug 6, 2009

Slow-Cooked Barbecue Pork with Sweet and Tangy Barbecue Sauce


These are such versatile recipes. Switch out the pork for beef or chicken if your tastes call for something different or if that's what is handy in your freezer. The slow-cooker makes the meat extra tender and the onions and garlic infuse it with flavor.

I've been diligently working to find the perfect barbecue sauce (well, perfect to me--I prefer a sweet, tangy concoction). With this sauce I've found it. Double the recipe if you want more and store in an air-tight container to use as your "house" barbecue sauce.


Pork Ingredients
1 1/2 to 2 pounds pork spare ribs
1/2 medium onion, roughly chopped
2 cloves garlic, quartered
2 cups water

Directions
In a slow-cooker add water, spare ribs (thawed or frozen), garlic and onions . Cook on low for 5 hours . Remove ribs from slow-cooker (discard onion/garlic/water) . Remove any bones, etc. from meat and discard . Place meat in a large bowl; using a fork, shred meat until it reaches desired consistency or bite-sized pieces . Add barbecue sauce (RECIPE BELOW) . Mix well . Serve on buns or sandwich rolls

Barbecue Sauce Ingredients
1 cup tomato sauce
1 cup ketchup
1 cup brown sugar
3/4 cup red wine vinegar
1 tbsp. butter or margarine
2 tsp. hickory smoked salt
1/2 tsp. paprika
1/4 tsp. chili powder
1/4 tsp cayenne pepper
1/4 tsp. garlic powder
1/4 tsp. onion powder
1/4 tsp. celery seed (or celery salt)
1/2 tsp. salt
1/2 tsp. pepper

Directions
Over medium heat, in a saucepan, mix tomato sauce, ketchup, brown sugar, vinegar and butter . Mix well . Add hickory smoked salt, paprika, chili powder, cayenne pepper, garlic powder, onion powder, celery seed, salt and pepper . Mix well . Reduce heat and simmer for 15 to 20 minutes . Serve with barbecued pork (above) or use as your standard barbecue sauce

Simple, Savory Brussels Sprouts

This is a divinely-simple recipe that ensures flavorful, perfectly-cooked sprouts each and every time. Brussels sprouts make a great accompaniment to a variety of main dishes. I love them served with chicken. Not too familiar with these petite little orbs? It's time to add a new vegetable to your arsenal.


Ingredients
Serves two
20 small Brussels Sprouts, rinsed
1/4 cup chopped walnuts
1 tbsp. butter
1 tsp. olive oil
Salt and pepper

Directions
Clean Brussels sprouts by slicing off small portion of ends and removing any discolored leaves .
Bring a pot of salted water to a boil . Add sprouts and boil for 8 minutes . Remove, drain and set aside . In a saute pan, heat oil and butter (medium temperature) . Add walnuts and cook 1 minute . Reduce heat . Add Brussels sprouts and toss to coat with butter, oil and walnuts . Cook 2-3 minutes . Season with salt and pepper . Serve

Aug 3, 2009

Mini Eggplant Parmesans


This Eggplant Parmesan recipe was inspired my a trip to my local farmers market. While visiting one of the stands, my husband and I spotted the most unusual vegetable we had ever laid eyes on. Purple-streaked, u-shaped and skinny. The vendor assured us that it wasn't some mutant vegetable, but indeed an Oriental variety of eggplant. I must have appeared to be quite intrigued by the nature of this plant--the woman sent it home with me for free. Because of the delicate nature of its variety, this particular eggplant does not need to be skinned.
This dish was great. It was easy to prepare and had incredible flavor. My husband even went so far as to say he felt like he was eating at a restaurant. Another great thing about these mini pots o' eggplant is that traditionally, this dish is served as an entree, not a side. I served mine with Italian-seasoned chicken breast and a slice of toasted, buttered french baguette.
Ingredients
Makes four individual servings
2 medium eggplants, Oriental variety, sliced into rounds (If using a normal eggplant, use one small, remove skin and cut into 2 inch, flat discs)
2 egg whites, lightly beaten
1/3 cup Italian-style bread crumbs
1/4 cup Parmesan cheese
1 tbsp. Italian seasoning
1/2 tsp. garlic powder
1 tbsp. olive oil
Cooking spray
2 cups tomato sauce
1 cup mozzarella cheese

Directions
Preheat oven to 350 degrees . Grease cookie sheet or baking stone with olive oil . Combine bread crumbs, Parmesan cheese, Italian seasoning and garlic powder in small bowl . Dip each eggplant round (top and bottom) in egg white and then coat thoroughly with bread crumb mixture . Lay each round on a cookie sheet . Bake for 25 minutes, flipping each round over half-way through . Spray four baking ramekins with cooking spray . Layer eggplant, then tomato sauce and then cheese and repeat until each ramekin is 3/4 full (ending with a layer of cheese) . Bake ramekins in 350 degree oven for 10 minutes or until cheese/tomatoes are bubbling . Serve in ramekins . Top with extra Parmesan cheese, if desired

Butterscotch Bars

The recipe for these Butterscotch Bars is courtesy of Cooking Light Magazine online. Simply stated, these indulgent dessert bars were a sweet success. While the outside of the bars is golden and crispy, the inside oozes buttery, butterscotch perfection. I would also add that these were simple to make and weren't ingredient-heavy (making them even more simple). To add pizazz, these bars could be drizzled with some reserved, melted butterscotch chips and/or served with a scoop of simple vanilla ice cream.

Ingredients
YIELDS: 36 servings (one bar)
1 cup brown sugar, packed
5 tbsp. butter, melted
1 tsp. vanilla extract
1 large egg, lightly beaten
9 oz. all-purpose flour (about 2 cups)
2 1/2 cups quick-cooking oats
1/2 tsp. salt
1/2 tsp. baking soda
Cooking spray
3/4 cup fat free sweetened condensed milk
1 1/4 cups butterscotch morsels (about 8 oz.)
1/8 tsp. salt
1/2 cup chopped walnuts (optional)

Making the Butterscotch Bars
Preheat oven to 350 degrees . Combine sugar and butter in large bowl . Stir in vanilla and egg . Weigh or lightly spoon flour into measuring cup(s); level with a knife . Combine flour, oats, 1/2 tsp. salt and baking soda in a bowl . Add oat mixture to sugar mixture . Stir with a fork until combined (mixture will be crumbly) . Place three cups of oat mixture in the bottom of a 9"x13" baking pan coated with cooking spray; press into bottom of pan; set aside . Place sweetened condensed milk, butterscotch morsels and 1/8 tsp. of salt in a microwave-safe bowl . Microwave on HIGH one minute or until butterscotch morsels are melted, stirring every 20 seconds . (IF USING WALNUTS, add to butterscotch mixture now and stir in) . Scrape mixture into baking pan, spreading evenly over crust . Sprinkle evenly with remaining oat mixture, gently pressing into butterscotch mixture . Bake at 350 degrees for 30 minutes or until the topping is golden brown . Place pan on cooling rack, run knife around outside edge . Cool COMPLETELY before serving

Jul 30, 2009

Fabulously Fresh


Summer brings many beautiful things. One of which being the gorgeous, fresh fruits and vegetables harvested by local farmers and gardeners. Red tomatoes sparkling with drops of dew, vibrant colanders in kitchen sinks, filled with green beans ready to be trimmed and juicy strawberries fresh from the plant are a few of my personal favorites. Taste is another aspect of fresh-from-the garden produce that can't be overlooked. I can't quite put my finger on it, but there seems to be an additional layer of flavor that is missing from that cellophane-wrapped bag of carrots I purchase at the supermarket. Having access to farm or garden-fresh produce is worth taking advantage of.

One way in which to go about acquiring the freshest produce is by paying a visit to your local farmer's markets. My husband and I are planning a trip to ours this Saturday morning. I have plans to purchase fresh fruits and vegetables that will take starring roles in some of next week's recipes.

Another great tool I recently came across is a website called Pick Your Own. This site provides information on local farms and gardens that allow patrons to visit and pick their own produce (i.e. berries, sweet corn, etc.). Choose your state and a list of local opportunities unfold in front of you. Planning a trip to a local farm for some berry picking would be a great family outing or even date!

Here is hoping you take advantage of some fabulously-fresh finds for your kitchen.

Beautiful photo of tomatoes courtesy of FreePhotosBank.com

Jul 28, 2009

Creamy Cucumber Salad

This year my husband and I planted our first garden. This recipe is a result of an overabundance of cucumbers from said garden. When I created this recipe I was looking for something simple, pretty and light, as well as something that would showcase the cool, crisp flavor of the vegetable. Creamy Cucumber Salad looks beautiful displayed on a bold platter, garnished with a little fresh dill.

Ingredients
2 large cucumbers, sliced (any variety, but I used English)
1/2 cup fat free or light sour cream
1/2 cup light salad dressing (such as Miracle Whip)
2 tbsp. vinegar
2 tsp. dried dill
1 tsp. all-purpose seasoning
Salt and pepper to taste

Directions
Combine sour cream, salad dressing, vinegar, dill, all-purpose seasoning, salt and pepper in a bowl, mixing until smooth . Add liquid mixture to sliced cucumbers . Toss well . Serve chilled

Classic Meatloaf and Dill Potatoes

The recipe for this Classic Meatloaf comes straight from my kitchen. I've been making it for years and it never fails. It is a simple recipe and--in my opinion--doesn't need a sauce to accompany it. I've paired it tonight with a side of Dill Potatoes--a recipe I adapted from the dish my mother prepared in the summertime.


Classic Meatloaf Ingredients
Serves 3 to 4
1 pound 93 percent lean ground beef
1 egg (lightly whisked to incorporate easier)
1/2 cup chopped onion
1/2 cup bread crumbs
2 tbsp. ketchup
2 tbsp. Worcestershire sauce
1 tsp. mustard
1 tsp. dried parsley
1 clove garlic, finely minced
Salt and pepper to taste

Directions
Preheat oven to 350 degrees . Combine all ingredients in a large mixing bowl . Don't be shy: take off that bling and use your hands to combine the mixture well . Transfer combined mixture into a loaf pan . Bake at 350 for 50 minutes or until center is cooked thoroughly . Remove from oven and allow to rest for 5 to 10 minutes before serving

Dill Potatoes


Ingredients
4 cups new red potatoes, cubed
4 tbsp. fresh dill
1/4 cup milk
1 tbsp. butter
Salt and pepper to taste

Directions
Bring a pot of salted water to a boil . Add potatoes and boil until very tender . Drain potatoes . Return potatoes to pan and turn off the burner . Add dill, milk, butter, salt and pepper . Stir to combine well . Serve in individual bowls, pouring remaining milk/butter mixture from pan on top of each serving

Jul 27, 2009

Garlic Lime Chicken and Fresh Greens

This recipe gets a great review. From its simplicity to prepare to its full flavor and gorgeous color, it was an all-around star. I loved the caramel color the chicken took on after grilling and the aroma of limes was reminiscent of the shores of Mexico. Garlic Lime Chicken made me want to put on my chicest sundress and sip a Corona. I hope you enjoy this recipe as much as I did.

Ingredients
Serves two, but double the recipe for four
Two boneless, skinless chicken breasts (thawed)
1/4 cup soy sauce
4 tbsp. fresh or bottled lime juice
1/2 tbsp. ground mustard
1/2 tbsp. Worcestershire sauce
2 cloves garlic, roughly chopped

Directions
Mix soy sauce, lime juice, mustard, Worcestershire sauce and garlic . In a container with a lid (or plastic zipper bag), combine liquid with chicken breasts . Allow to marinade at least 30 minutes (I left mine 5 hours) . Remove chicken from marinade . Use a gas or charcoal grill OR a grill pan to cook chicken until no longer pink (approximately 6 to 8 minutes on each side depending on thickness)

Fresh Greens to Accompany Chicken

Ingredients
4 cups romaine lettuce, chopped
1 medium carrot, diced or cut into ribbons (using a peeler)
1/2 cup cooked corn (fresh, frozen or canned)
1/4 cup pepper jack cheese, shredded
Dressing of your choice (Note: pairs well with a Ranch-style dressing)
Garnished with lime wedges

Directions
Combine all ingredients . Enjoy

Apple Cinnamon Cheesecake


This is hands-down one of the most delicious cheesecakes I have ever created. It all began with my no-fail basic cheesecake recipe. Set on top a sweet, cinnamon crust, this creamy cheesecake topped with decadent cinnamon apples was decadent. The cinnamon and apples were reminiscent of harvest--I'll be sure to make this dessert again this fall. I accessorized my cheesecake with two cinnamon sticks.

Cheesecake Ingredients
2 cups finely-crushed vanilla wafer cookies
1/4 cup butter or margarine, melted
1/2 tsp. cinnamon
2 packages (8 oz. each) cream cheese, softened
1/2 cup sugar
2 tsp. vanilla
2 large eggs


Making the Cheesecake
Heat oven to 350 degrees . In medium bowl, mix cookie crumbs, butter and cinnamon . Press firmly against bottom and sides of a 9 inch glass pie plate OR a spring form pan . In large bowl, beat cream cheese, sugar, vanilla and eggs with electric mixer on low speed until smooth . Pour mixture on top of crust in pie plate/pan . Bake 40 to 50 minutes or until center is set . Cool at room temperature for one hour . Top with apple cinnamon mixture


Topping Ingredients
5 apples, peeled and diced
1/2 cup sugar
2 tbsp. water
1 tbsp. lemon juice
1/4 tbsp. vanilla
1 tbsp. cinnamon (use more or less depending on how much spice you like)
2 tbsp. water
1 tbsp. cornstarch

Making the Topping
In a sauce pan, cook and stir diced apples, sugar, water, lemon juice, vanilla and cinnamon until boiling . Reduce heat . Cover and simmer for 5 minutes or until fruit is almost tender, stirring occasionally . Combine 2 tbsp. water and 1 tbsp. cornstarch and add to filling . Cook and stir until thickened and bubbly . Cool, then spoon evenly over cooked, cooled cheesecake

Simple Tip: Do not insert a knife into cheesecake because the hole may cause the dessert to crack as it cools.

Jul 25, 2009

Currently Craving

I posses and equal affinity for flashy high heels and flashy kitchen accessories. Just as slipping on a fabulous pair of shoes can transform your mood, using a fun, bright or bold kitchen tool will surely inspire some culinary creativity in your kitchen. The following are some colorful kitchen gadgets I'm currently craving:

Joseph Joseph Nesting Bowls: Conran USA . Digital Meat Thermometers: Sur la Table
Zak! Designs Happy Spoons: Kitchen Kapers


Black Bean Tortilla Pie

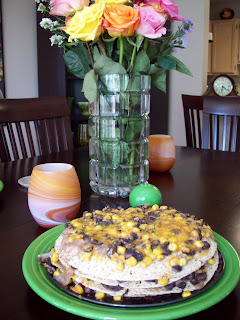
This recipe for this layered dish comes from the Martha Stewart website. It is a meatless main dish--a perfect vegetarian option. Black Bean Tortilla Pie was filling, easy-to-prepare and full of flavor.

Ingredients
4 (10-inch) flour tortillas
1 tablespoon canola oil
1 large onion, diced
1 jalapeno chile, minced (remove seeds and ribs for less heat) 2 cloves garlic, minced
1/2 teaspoon ground cumin
Coarse salt and ground pepper
2 cans (15 ounces each) black beans, drained and rinsed
12 ounces beer, or 1 1/2 cups water (I used water)
1 package (10 ounces) frozen corn (I used one can of corn)
4 scallions, thinly sliced, plus more for garnish
2 1/2 cups (8 ounces) shredded cheddar cheese


Directions
Preheat oven to 400 degrees . Using a paring knife, trim tortillas to fit a 9-inch springform pan, using the bottom of the pan as a guide . Set aside . Heat oil in skillet over medium heat . Add onion, jalapeno, garlic and cumin; season with salt and pepper . Cook, stirring occasionally, until onion is softened, 5 to 7 minutes . Add beans and beer (or water) to skillet and bring to a boil . Reduce heat to medium; simmer until liquid has almost evaporated, 8 to 10 minutes . Stir in corn and scallions and remove from heat . Season with salt and pepper . Fit a trimmed tortilla in bottom of springform pan; layer with 1/4 of the beans and 1/2 cup cheese . Repeat three times, using 1 cup cheese on top layer . Bake until hot and cheese is melted, 20 to 25 minutes. Unmold pie; sprinkle with scallions . To serve, slice into wedges


Jul 24, 2009

Golabki

The preparation of this dish is a tribute to my Polish grandmother. I grew up savoring this dish at our large family get-togethers and its taste takes me back to such times. Although the recipe is not my grandmother's, it was absolutely delicious. The savory filling wrapped in tender cabbage and topped with tomatoes was pure comfort. This recipe is compliments of Emeril Lagasse of Food Network.

Ingredients
1 small whole white cabbage
2 tablespoons butter
1 pound ground beef
Salt
Freshly ground black pepper
1 cup chopped onions
2 cups cooked, long-grain white rice
1 egg
1 teaspoon finely chopped parsley leaves
1/4 cup water
For the sauce:
2 tablespoons butter
2 tablespoons flour
1 cup peeled, seeded and chopped tomatoes
1 teaspoon chopped garlic
Pinch of sugar
Salt
Freshly ground black pepper
1 cup chicken stock
1/2 teaspoon dried thyme
Directions
Cut the cabbage in half lengthwise and remove the core . Peel a couple of the outer leaves away from the cabbage halves and discard. Bring a pot of salted water to a boil . Add the cabbage and cook for 20 minutes or until tender . Remove from the water and cool completely . Carefully divide into individual leaves (eight whole leaves are needed) . Set aside . In a large saute pan, over medium heat, melt the butter . Add the meat. Season with salt and pepper . Brown the meat for 5 minutes . Add the onions . Season with salt and pepper . Continue to cook for 4 minutes, or until the onions are translucent . Remove from the heat and turn into a mixing bowl . Cool slightly . Stir in the rice, egg and parsley . Mix well. Season with salt and pepper . Preheat the oven to 375 degrees . place 1/2 cup of the meat and rice mixture in the center of each cabbage leaf . Roll up each leaf tightly . Place in a shallow baking pan, add the water and cover with foil . Bake for 30 minutes . In a saucepan, over medium heat, melt the butter . Stir in the flour and cook for 4 minutes for a blonde roux . Stir in the tomatoes, garlic and sugar . Season with salt and pepper . Continue to cook for 2 minutes . Stir in the stock and the thyme . Bring the liquid to a boil, reduce to a simmer and continue to cook for 15 minutes or until the sauce coats the back of a spoon . To serve, spoon the sauce over each cabbage roll

Potato Pizza

When speaking of pizza, it really doesn't get much simpler than this. My recipe is adapted from a phenomenal little cookbook called The Book of Pizzas and Italian Breads by Sarah Bush. The pizza was very flavorful, hearty and offered my palate something different.

Ingredients
Two packages of store-bought pizza crust mix (I chose Betty Crocker and will note that I added some garlic seasoning to the crust when kneading)
8 small potatoes, peeled
Dash of salt
1 cup pizza sauce (use any you like)
1/2 cup shredded cheddar cheese

Preparing Your Pizza
Cook potatoes in salted boiling water in a medium saucepan 10 to 15 minutes . Drain, cool slightly, then slice thinly . Meanwhile, preheat oven to 425 degrees . Prepare your dough according to the package directions . Prepare your pizza pan, if necessary (stones and non-stick options don't need greased) . Roll out dough into round shape and place on pizza pan . Spread pizza sauce over dough . Arrange potato slices on top . Sprinkle with salt . Top with cheese . Bake approximately 20 minutes or until crust is golden . Serve and enjoy

Watermelon Granita

I discovered the recipe for this simple, refreshing granita while flipping through an issue of Country Living Magazine. Unlike other granitas, with this recipe there is no need to turn on your stovetop. Additionally, it freezes quickly and looks gorgeous served in a martini glass. For the adults, a splash of vodka makes this icy treat even more delectable.


Ingredients
4 cups cubed fresh watermelon
1/2 cup sugar
2 tbsp. lime juice

Making Your Granita
Purée all ingredients in a blender . Pour into a 9-by-13-inch dish (I used a deep cookie sheet) and place in the freezer . Stir with a fork every 30 minutes until mixture is slushy (up to 2 1/2 hours)
Simply Delicious Baked (Whole) Chicken


Ingredients
1 whole chicken
1 tbsp. olive oil/butter
4 garlic cloves
1 tbsp. dried sage
1 tsp. dried rosemary
1 tsp. kosher/sea salt (table salt will work, also)
½ tsp black pepper
1 cup water (chicken/vegetable broth can be used also)
Preparing the bird
First allow the chicken to defrost completely . Next, remove innards/giblets/etc. from the cavity of the bird . Rinse chicken (outside and in) with cool, tap water . Pat chicken dry with a paper towel
Baking the bird
Pre-heat your oven to 500 degrees. In a roasting pan, pour water and layer with vegetables (vegetables are optional) . Set aside . Cut several slits in the chicken skin and place garlic cloves in the slits (I like to distribute them in various places around the bird and even place one in the cavity) . Massage olive oil/butter into the skin of the chicken (yes, I said massage) . Evenly distribute sage, rosemary, salt and pepper on the outside of the bird . Place bird on top of vegetables in roasting pan . Turn oven temperature to 350 degrees and place chicken in oven . Cook for 1 and ½ hours (until internal temperature of bird reaches 165 degrees--using meat thermometer) . When chicken is thoroughly cooked, remove from oven and allow to rest for ten minutes . Savor the fruits (or bird) of your labor

A Simple Note Regarding Food Safety
Cooking and enjoying a delicious chicken dinner should be just that—enjoyable. To avoid any food safety kitchen conundrums, check out this extremely helpful website from the USDA. Whether you’re new to cooking or need to brush up on your knowledge of safe food handling, there is a plethora of great information to ensure a happy, healthy kitchen (and tummy).
http://www.fsis.usda.gov/Fact_Sheets/Chicken_Food_Safety_Focus/index.asp